|
TK22 Tutorial |
By Nate ( Captain Nemo12@RCU) |
I've been busy for the past few days
preparing a beginner's tutorial for connecting and setting up the TK-22.
Since I am using this board for this build, I figure this thread would
be a good place to put it. The TK-22 is the first custom
RC tank control board I have ever used, before that I had the old
RX-14 board.
 I chose the TK-22 because of the following reasons:
-Easy to install - all the cables necessary are already included with
any stock RX-18 Heng Long tank. This is pretty much plug and play as you
will see very soon.
-Support for HL and Tamiya battle systems - even though I don't do IR
battling very much, having compatibility with Tamiya is always a great
thing.
-Servo recoil and elevation - This makes a world of difference when
installing the turret functions.
-Great sounds - there are a lot of versions of the TK-22 available, each
with its own engine sounds, depending on the tank you have.
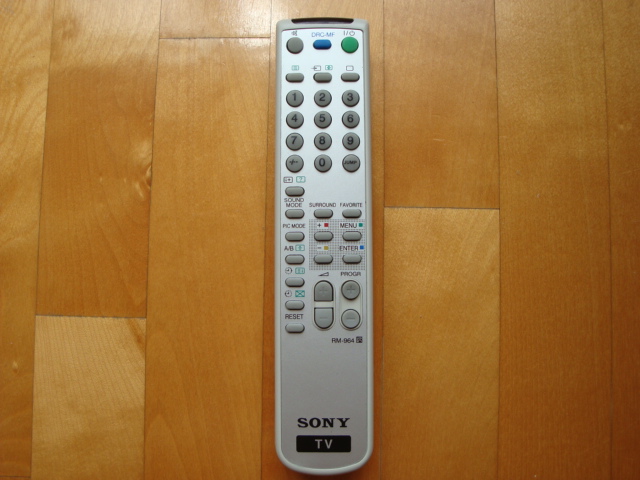
-Easy and straightforward programming - No need to connect to a computer
or playing around with computer programs, all the programming is done
via a Sony TV remote.
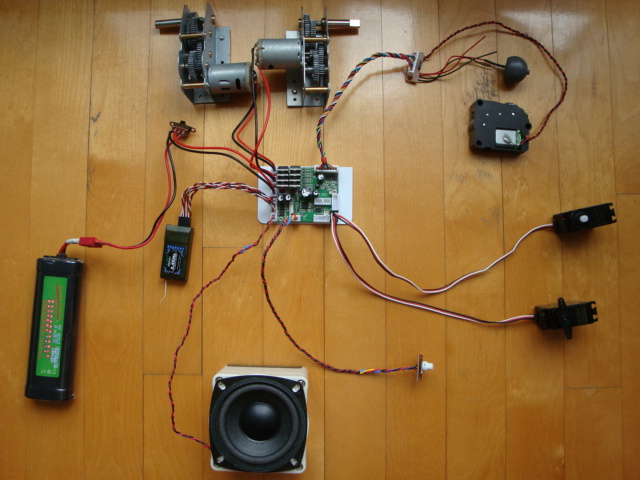
So let me show you how easy it is to install this board. First, let's
take a look at the electronics and cables that are required. Note that
all of these cables and connectors are included with any HL RX-18 tank,
the only modification I did was to extend the wire length.
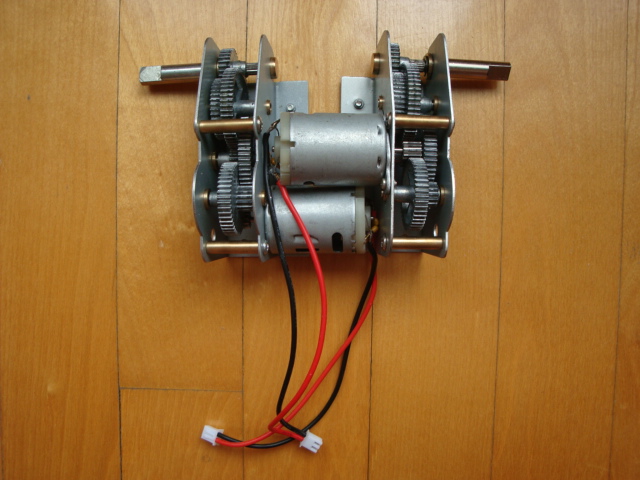
First, we have the engines:
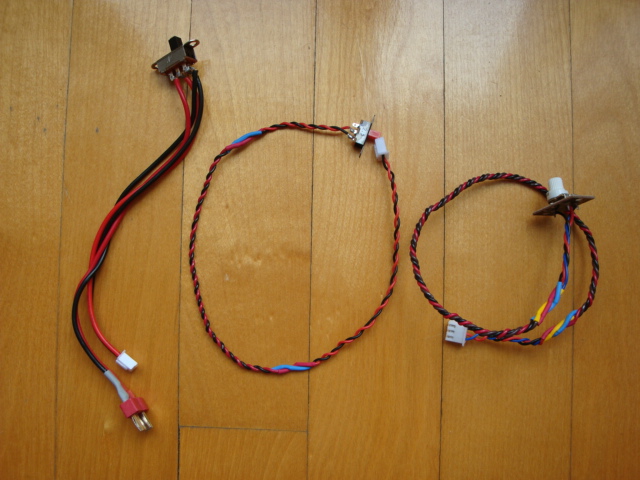
Next is the battery switch cable, the smoke
generator switch, and the volume knob:
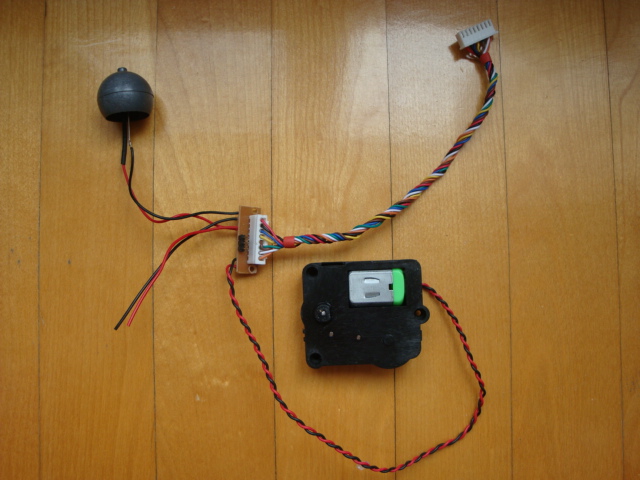
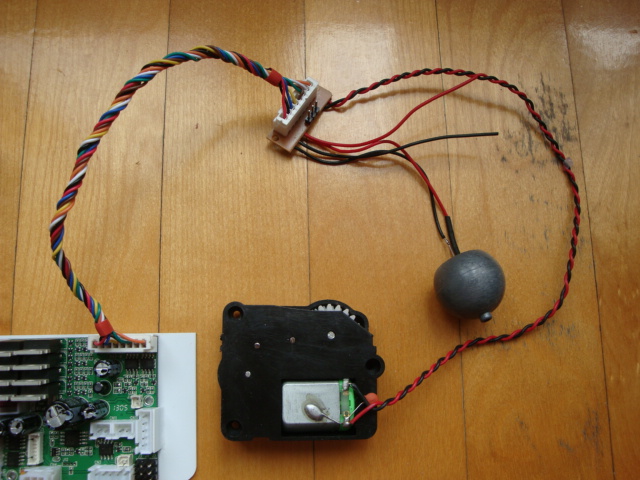
Here is the turret traverse unit and the MG
ball mount with the gun barrel
LED, they are connected to an 8-pin connector. The two cut wires
shown were connected to the head lamp LED, I had to cut it to make
disassembly easier:
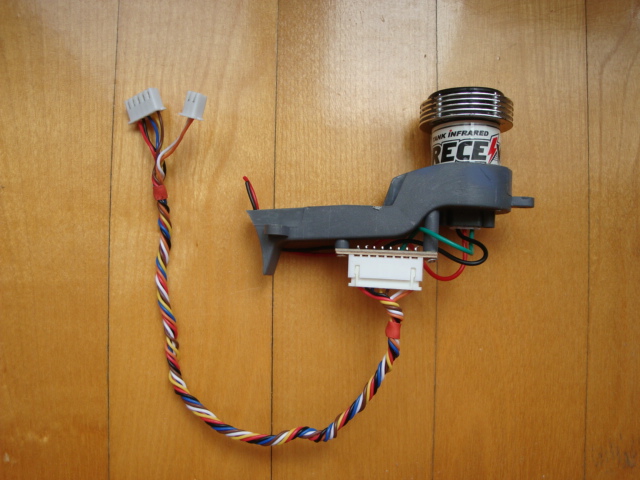
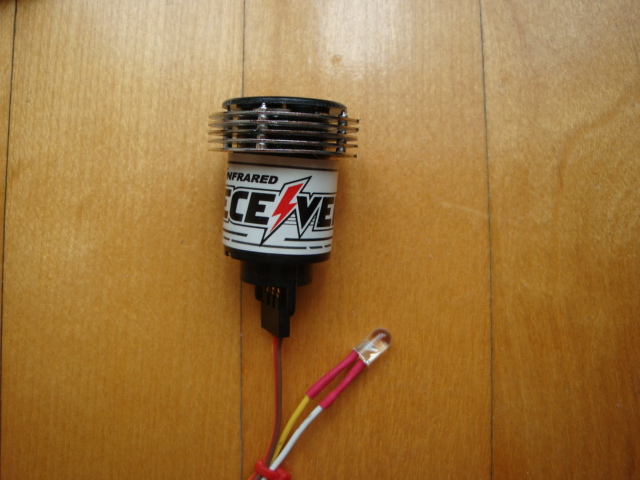
Next is the IR receiver (apple) mount from
the turret. Once again, to make removal easier, I've cut the two wires
for the IR emitter LED in the mantlet, as well as the little thin wires
from the recoil unit. The rest of the unit is untouched.
We also have the speaker, seen previously:

and lastly, we have the HL recoil and
elevation units. I will not be using these as I prefer using the
servo recoil and elevation features on the TK-22.

I've also disconnected the barrel flash LED
(always found it a bit gimmicky).
Lower Hull Functions:
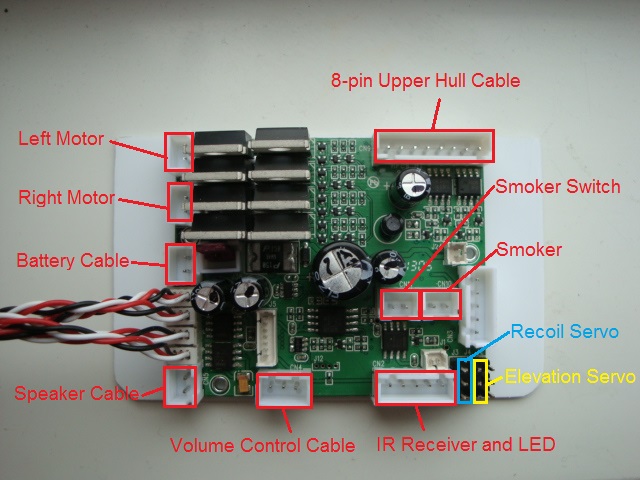
With all the electronics and cables
gathered, let's take a look at where they go on the board. For your
reference, I've made the pin-out picture below. You may want to save it
for future reference:
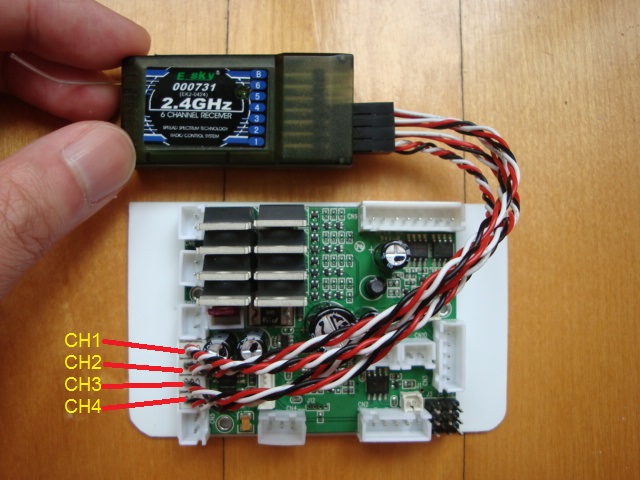
First, let's connect the receiver cables.
You must have a receiver of at least 4-channels, I'm using an E-sky 6-ch
2.4 GHz receiver. For standard Mode 2 transmitters, go ahead and
connect the four receiver cables to their corresponding channel numbers
on your receiver (CH1 -> CH1, CH2 -> CH2, etc). Note that for Mode 1
transmitters, you must switch the CH2 and CH3 cables (i.e. CH2 -> CH3,
CH3 -> CH2).
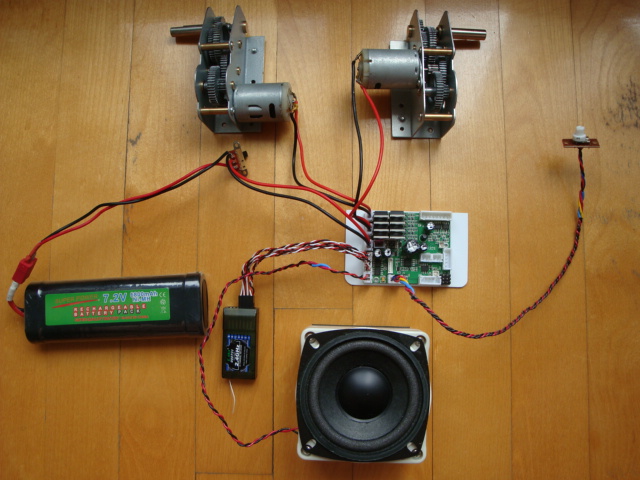
Next, connect the drive motors, the
speaker, the volume control, and the battery/main switch cable to their
corresponding sockets on the TK-22 (refer to the first picture above).
The connectors only fit in one way, so you don't have to worry about
accidentally reversing the polarities:
Connect the 8-pin upper hull cable with the
turret traverse and MG
LED units attached:
At this point, we are ready to test the lower hull functions! Center all
your transmitter control sticks and trims, set all servo reverse
switches to normal, turn on your transmitter and the battery switch, you
should not hear any sound coming from the speaker. For a Mode
2 transmitter, your right stick controls the directional functions,
move this stick around and you should see both drive motors and their
gearboxes move. Once again, there should not be any engine sounds
coming from the speaker!
Now we are going to turn on the engine
sound, note that the TK-22 allows you to run the main drive motors even
with the engine sound off (as demonstrated previously). To turn the
engine sound on, move your your left stick to the lower right position
and hold it there for about 2 seconds.

You should hear the engine starting up and
idling. If you don't hear any sound, play with your volume knob and
check all your servos reversing switches.
Now move the left stick to the lower left, you should hear the machine
gun sound, and the MG barrel LED should be
lighting up:
Lastly, center your left stick and move it
left or right along the center line. You should hear the turret rotation
sounds and the turret traverse unit should be rotating. The great thing
about the TK-22 is that the turret traverse function is fully
proportional! The further you move the left stick, the faster the turret
will rotate:
That's it for now! By the end of this post
you should have a fully functional lower chassis and turret traverse.
Next post I will show you how to install the servo recoil and elevation,
which will require a tiny bit of programming with the Sony remote:
TK-22 Programming Tutorial - Servo
Recoil and Elevation:
The TK-22 by default, is programmed to work
with the Tamiya recoil unit. The the HL gun elevation unit can be
installed as well, but requires re-soldering some wires to achieve
bi-directional control (for more information, consult Clark's website:
http://www.clark-model.com/eng/prod_rx20/index.html). For beginners,
I recommend using servo recoil and servo elevation, since these do not
require soldering, and are easy to install. This will also be a good
opportunity to showcase the TK-22's programming functions. In this
tutorial I will be showing how to program the following functions:
- Enabling servo elevation
- Enabling tank momentum
- Disabling track recoil
- Setting the gun reload time to 5 seconds
The servo recoil is enabled by default, so if you plug in a servo into
the servo recoil pins, it will still rotate no matter type of recoil
unit you connect (i.e. Tamiya or HL). This also means that no
programming is necessary to enable the servo recoil!
Before we begin programming, you must connect the apple into the
commander's hatch socket and the 5-pin IR cable to the IR Receiver and
LED port. There are two 5-pin sockets on the TK-22 so be careful not
to mix them up!

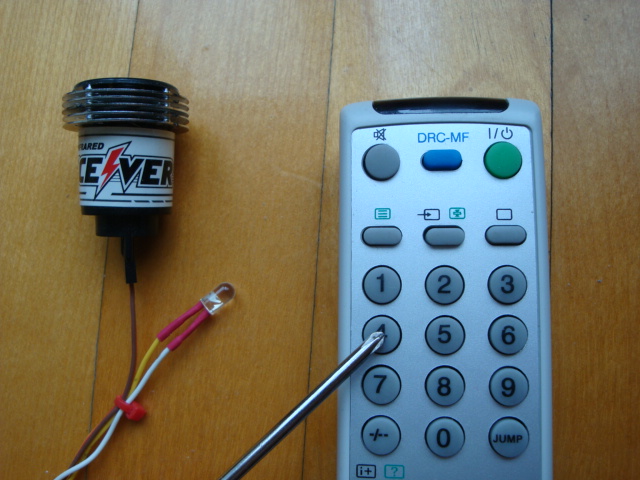
For a stock HL IR tank, the LED in the gun mantlet is actually an IR LED
used to send the firing signal to the opponent tank. For programming
purposes, you must replace this LED with a standard light LED because
its flashes will be used as a visual feedback to indicate which setting
you're on. I actually ran out of LEDs so I will use the cable that I
made for my T-34 to demonstrate (this is identical to the set-up in the
previous picture, minus all the grey plastic and with the addition of a
red LED):
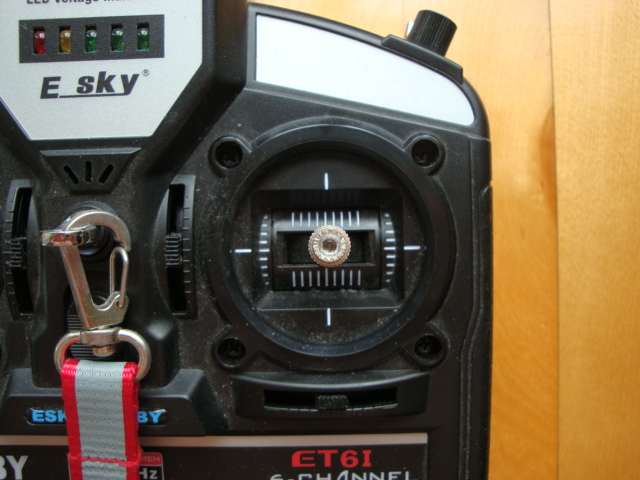
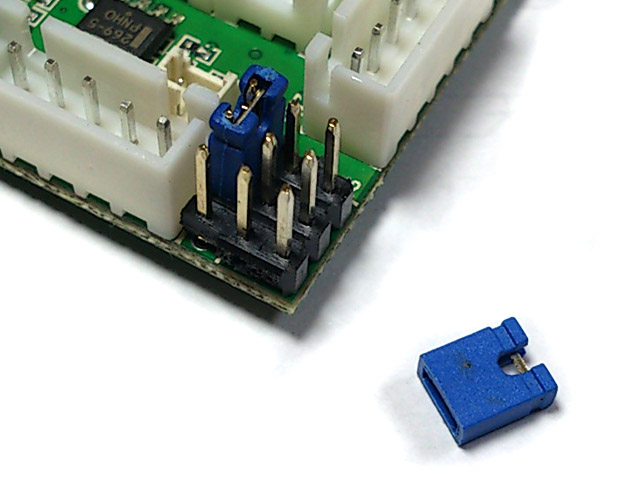
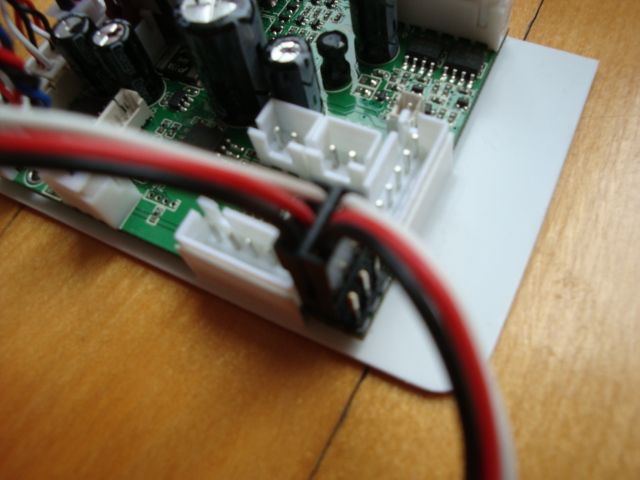
Next, you must short the first two pins on the recoil servo terminal
using a jumper as follows (pic from Clark's website):
With the main battery connected, turn on the TK-22 but not the
RC transmitter! Remember to install two AA batteries into the
Sony remote.

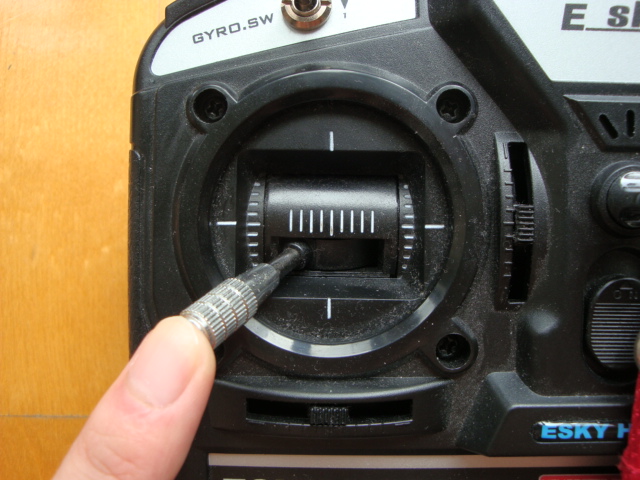
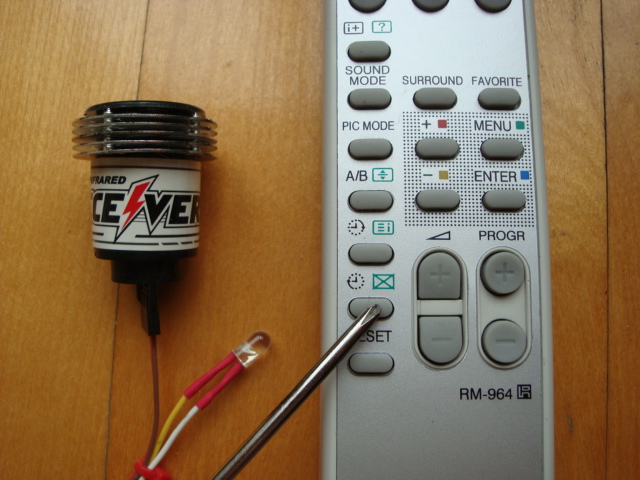
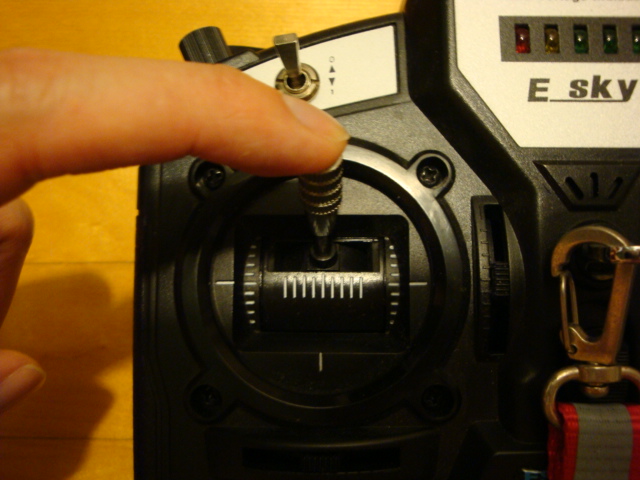
Enabling servo elevation:
To enable servo elevation, press (do not hold) the green POWER button
until the LED flashes 4 times:

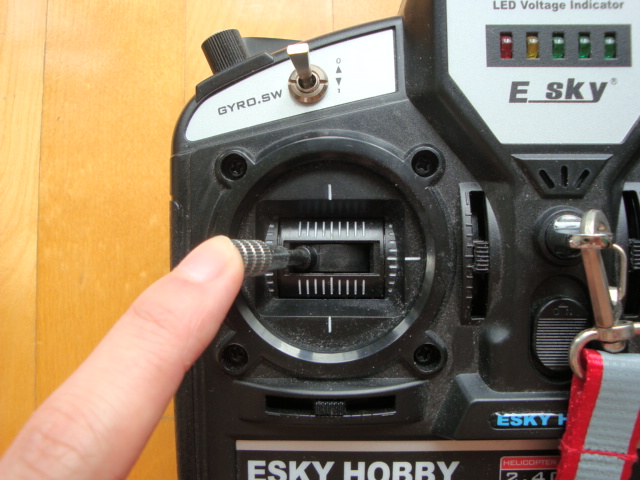
Enabling Tank Momentum:
With the momentum feature on, you will no longer have the jerky start-up
and stop like on a stock RX-18 tank. Instead, the motor will spool up
and down slowly when you are accelerating and decelerating, simulating
the weight of a real tank. To turn this on, press the SLEEP button until
the LED flashes 2 times:
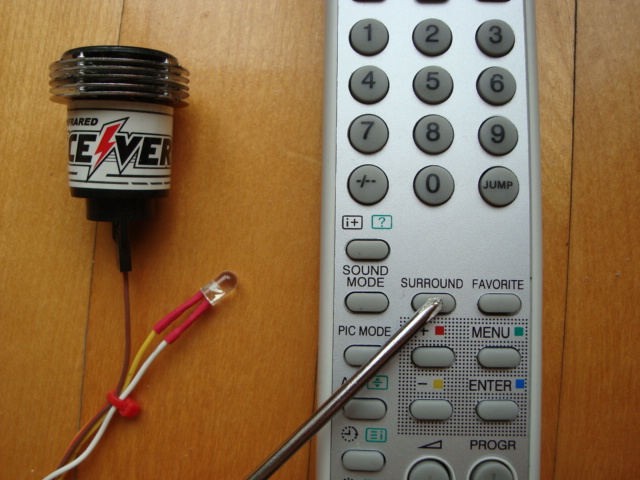
Disabling track recoil:
Never liked the track recoil when the main gun fires, it seemed too
gimmicky and toy-like. To turn this off, press the SURROUND button until
the LED flashes 2 times:
Setting the gun reload time to 5 seconds:
The default reloading time is 9 seconds, which was too long for my
liking, so I decided to change it to 5 seconds. To do this, I pressed
the "4" button until the LED flashed 5 times:
And that's it for programming! Now unplug the jumper from the servo
recoil pins and turn the TK-22 off. Next, plug in the recoil and
elevation servos, pay attention to the wire orientations here! The black
wire should be facing outward:
Set-up is now done! Turn on your RC transmitter and the main battery on
the TK-22, move the right stick to make sure that the drive motors are
functioning fine. You should notice that with the momentum turned on,
the gears spool up and down much more smoothly.
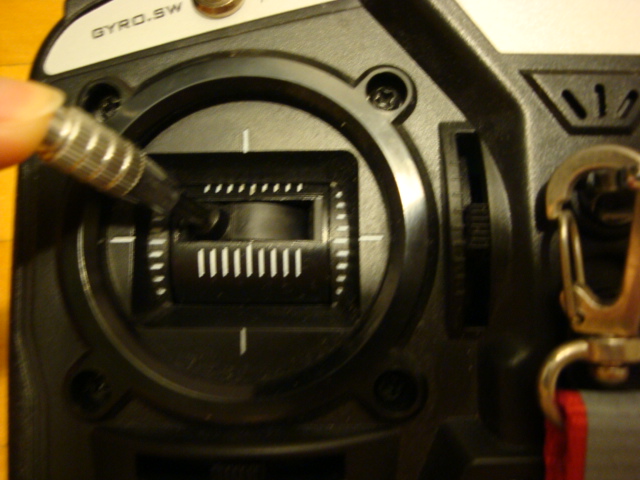
To fire the main gun, push the left stick to the topmost position, you
should hear the gun sound coming from the speaker and the recoil servo
should rotate as well:
To elevate or depress the gun barrel, move the left stick roughly to the
"75% throttle position" and slide it left or right. You should hear the
gun elevation sounds, as well as seeing the elevation servo move:
I recommend doing all of this with all the components disassembled from
the tank and laid out in front of you. Doing so can prevent the tank
from accidentally rolling off the table and also helps you identify any
loose connections or incorrect wirings:
The TK-22 has much more programming options available, all done by
pressing various buttons on the remote. For the full list, please see
Clark's website:
http://www.clark-model.com/eng/prod_rx20/index.html
Anyways, this pretty much sums it up, I hope you enjoyed my tutorial!
Now back to the build...
Nate
|